So I have been wanting to design and build a new shed for a while and finally got around to doing it this past Summer 2022. There has been a big problem with homelessness in my area lately and I have been seeing all of these new sanctioned homeless camps popping up all over with these little shed like structures for homeless people to live in and I was wondering what it would cost to make a similar structure that I could use as a shed or for backyard camping. My main factor in design was cost, I wanted to build it the most affordable way possible and in doing so this would also mean having as little construction waste as possible. So I basically started out the design with the most basic materials in mind; 4’ x 8’ plywood and 2”x4”x8’ boards. I didn’t follow any outside plans and just came up with designs from my imagination on what I could build with 4’ x 8’ plywood and 2”x4”x8’ boards, In doing so it seemed a flat sloped roof lean-to shed would be easiest to construct and there was an example at my neighbor’s house that I had in mind for inspiration: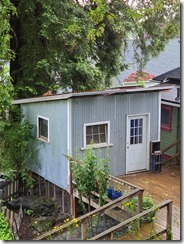
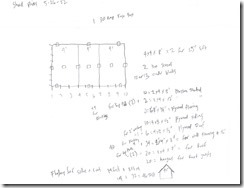
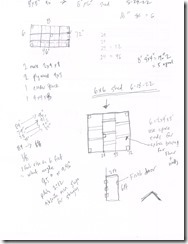
So with these basic ideas in mind (4’x8’ plywood, 2”x4”x8’ boards, flat roof lean-to design, economical, low waste) I got started penciling in some designs. My first idea was a basic 8’ X 12’ floor plan:
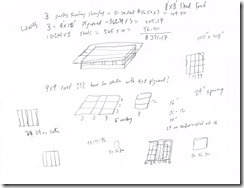
But then after thinking about it, I started downsizing because of cost and the size of space I had available to site it, so I downsized from a 12’x8’ footprint to a 8’x8’ footprint, then to a 8’x6’ footprint then finally decided on a 6’x6’ footprint. This smaller size would be the cheapest option, plus it would be good as a prototype as mistakes at a smaller scale cost less, and once I figured out what I was doing I could build a bigger version next summer if desired. So a 6’x6’x8’ lean-to shed was the final design:
I have basic carpentry skills, but it had been a while since I had utilized them, so I figured I would turn to the tried and true YouTube to gain some more tips on how to build this shed. There are many great carpenters and videos on how to build sheds on YouTube, Some that I really enjoyed were:
https://www.youtube.com/@Bushradical– This guy is very talented in all things off grid I watched a ton of his videos about; building off grid cabins, milling your own lumber, drilling your own water well, they were all very impressive.
https://www.youtube.com/@icreatablestv– This is the main place I found ideas on how to build my actual lean-to shed, it was very helpful and I recommend it if you are interested in this sort of thing.
https://www.youtube.com/@PracticalRoofingConcepts– This is where I found out information on how to do roofing, it was helpful and I recommend if you are interested in this sort of thing.
So after watching these videos for inspiration I got to work building my own shed.
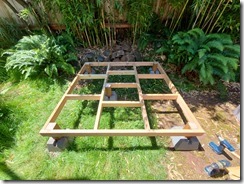
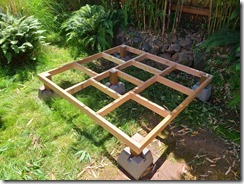
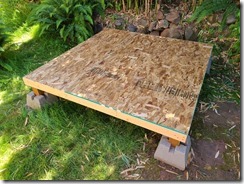
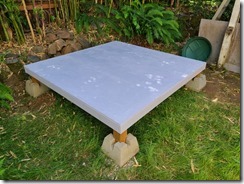
I started with a basic 6’x6’ floor and here is where in retrospect I wish I would have done a few things differently. First I probably should have used pressure treated wood for the floor joists, I figure 2”x4” were probably ok because it was a pretty small shed, if it was any larger I would have used pressure treated 2”x6”. Second this was the first plywood I bought (for this project) and went for the cheapest stuff, I asked the fellow at the lumber store if it would work for a shed floor and he said sure, so I bought two 1/2”OSB 4’x8’ plywood sheets and used them for the floor, but I wish I would have invested more in some nicer exterior grade 5/8” or 3/4” instead, live and learn as they say. I also wish that I would have put the seam where the plywood sheets meet in the back parallel to the door, that would have made it less noticeable and probably structurally better because of how I would have had the bed situated over it, that is something to think about for the next build, anyhow those are the three main mistakes I feel I made in building the floor.
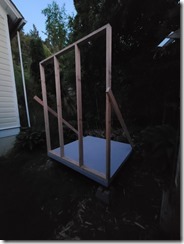
Next up were building the walls, my stepdad who is an architect mentioned after the fact that it is industry standard to use a jig on the ground to prefab the walls, which is what I would probably do in the future, especially if I had room and was going to mass produce them, but because I didn’t have that much room or money to build a jig to prefab the walls I just used the floor as my work area and built square walls the right size and then put them up and added bracing later, it probably would have been easier to add the bracing before I put them up, but I was kind of figuring everything out as I went, so again that would be something to think about on the next project.
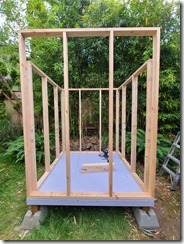
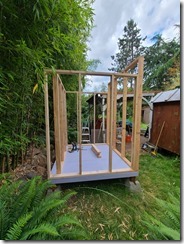
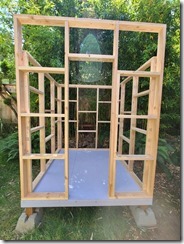
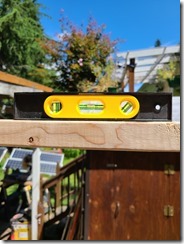
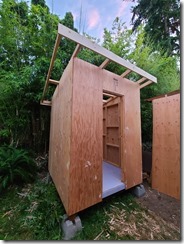
The next step was the roof and that was probably the most intricate carpentry, doing the Birdsmouth cut was something new for me, and here I made another mistake. I should have cut all the rafters all the same size all at once, because my shed was pretty square and all measured correctly, the identical rafters would have pulled it all into even better alignment if they were all cut the same, but instead I measured and cut each one individually and this took more time plus it allowed a bit of imperfection into the design, not much, but the roof was just a tad out of square by around a .25” so that I had to trim off some plywood on the roof when installed on top of the rafters and I think that is because I didn’t make all the rafters the same, live and learn. The shed though turned out pretty square and level overall.
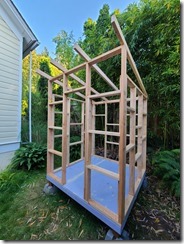
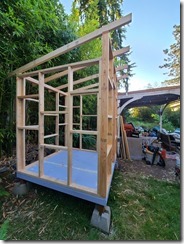
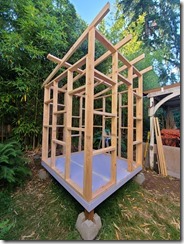
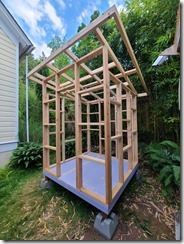
The next step was putting on the exterior plywood sheathing, and since I’m a one man band this presented some issues, at least for the walls, but I figured out how I could use some scrap lumber and build little platforms so that I could rest the plywood on those while I attached the plywood to the exterior framing, The roof plywood sheathing wasn’t as tricky, all I had to do was get the plywood up there and then installing it was pretty easy, I had designed it so that two 4’ x8’ pieces would fit up there perfectly so that I didn’t have to cut or waste anything, but as I mentioned before I had about a 1/4” overhang in places because I guess the roof got out of perfect square and I think it had to do with me individually measuring the rafters instead of cutting them all the same, plus I put the fascia up also. Anyhow it went together pretty well overall.
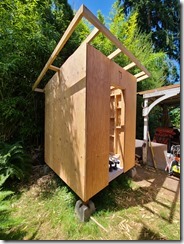
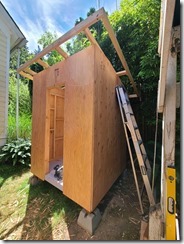
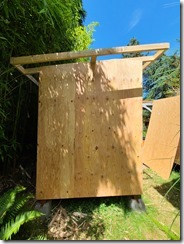
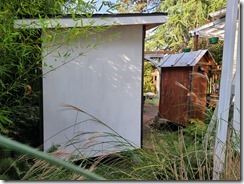
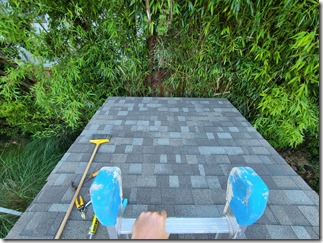
So once I got the fascia, plywood roof sheathing and drip edge flashing on it was time to put down some roofing paper and asphalt shingles (you put the roofing paper under the drip edge flashing on the rake and over it on the eave) . I had never installed asphalt shingles before so I had to watch a bunch of YouTube videos before I felt ready to go, but once I got the hang of it it was pretty easy, probably because the roof wasn’t steep and the nails you use are easy to hammer, so that was one of my favorite parts of the project. I also gave everything a base coat of white exterior paint. I don’t think that you are supposed to paint exterior grade plywood, but for now that was going to be the exterior, most people would have used a more decorative plywood if it was meant for a final face, or add some sort of exterior siding material, but at the time I was making this shed lumber prices were just starting to come down but were still pretty high, I was paying around $34 a sheet and the decorative stuff was going for around $65 a sheet, but if cost wasn’t one of my main factors in building this I would have gone with the decorative plywood instead. I also installed the door which was just a piece of plywood that I had cut out previously and I installed the soffits. I made the soffits in the front and back able to open and close to help regulate the airflow, humidity and temperature. I have an old garden shed that someone else built a long time ago and a few of the things I dislike about it are that it doesn’t have any overhanging eaves, and that it is very stuffy and has poor airflow, so with this new shed I made sure those issues were corrected.
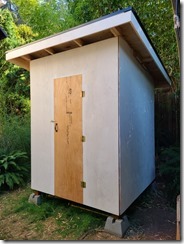
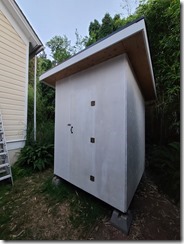
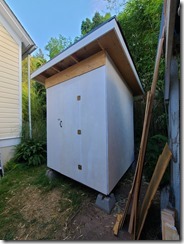
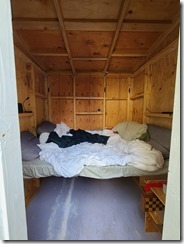
So now I was getting pretty close to being done with this project, all I needed to do was put some trim on the corners and figure out what to do with the interior. I decided on metal flashing for the corner trim because of how well it works. The old shed I mentioned has wood trim on the corners and they are all rotting, and I had tried this metal corner trim method before on a smaller found/spare lumber shed I had made a few years earlier (you can see it in the last photo of this post on the right hand side) and it worked great. Although when I mentioned it to my stepfather the architect he was aghast that I would put metal corner trim on a wood structure, but I prioritize function/affordability over style most of the time so I like it. For the interior I added more bracing with metal brackets so that I could use 6’ 2”x4”’s and plywood scrap to make adjustable benches, shelves, bed, etc.. so I could use it for camping or storage and all I have to do is move the boards around depending on what I need to use it for.
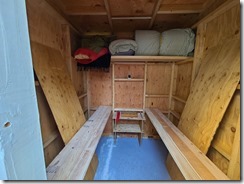
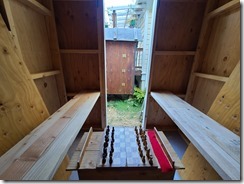
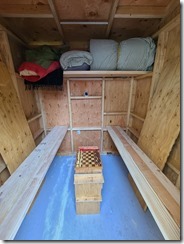
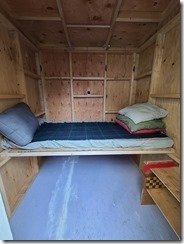
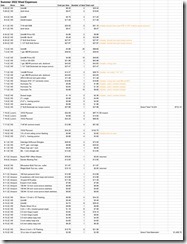
Final Thoughts- Well the shed turned out pretty much as I planned it, I barely had any waste, made a few minor mistakes but nothing major and feel like I learned a bunch and would consider it a successful carpentry project. It is comfortable enough for short term camping for three seasons, but would probably need to be insulated to be used comfortably in the wintertime as a place to camp. It’s also pretty small and works for a single small to medium sized person, but for two people or a larger person you would probably want a larger one, 8’x6’, 8’x8’, or 12’x8’ would be better, you would also need to add a window or two to make it safer and more comfortable to live in continuously, but with no windows it is great for storage or a night of summertime overnight backyard camping. I was hoping that I could build it for under $1000 in materials cost, but it was actually around $1450, as you can see in the expense spreadsheet below. It would be a fun business to have a truck and trailer and have everything pre-cut and prefabbed where you could just show up, unload and assemble it in a day or two with another helper, and maybe do the same with any of the D.I.Y. shed or tiny house kits that you can order from Amazon or The Home Depot nowadays. I need to figure out what they are paying for the homeless camp’s tiny houses to see if I could somehow be competitive with them. I still have a ways to go skill wise and have so much other stuff on my plate that this will most likely remain more as a hobby for now.
